


Introduction
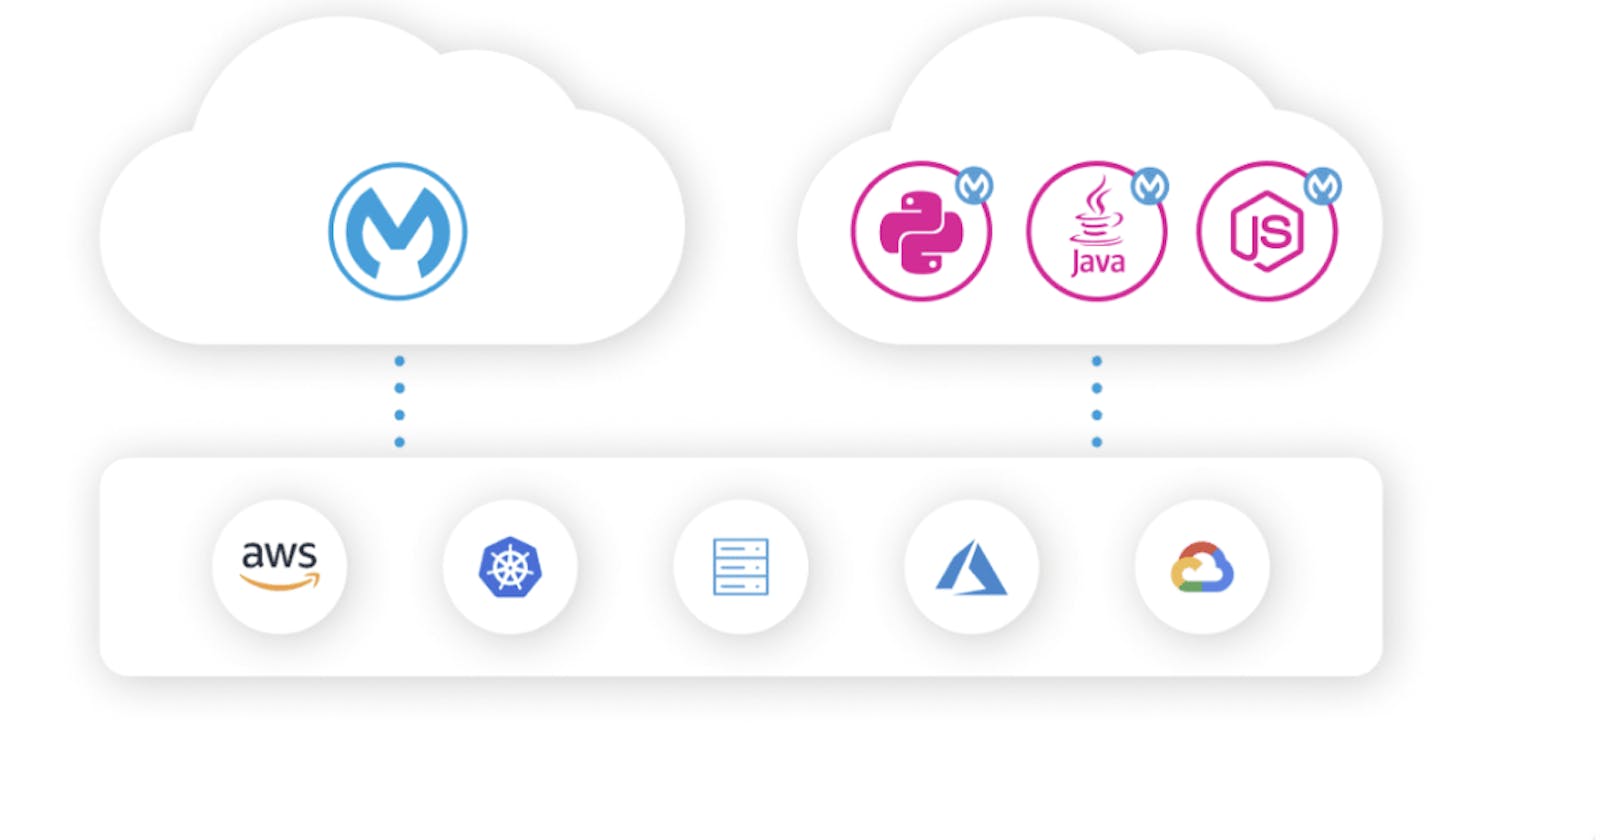
MuleSoft's Flex gateway is an ultrafast way to manage and secure APIs running in a server/container with full capabilities offered by MuleSoft's API Manager.
MuleSoft's API Manager provides an industry-leading way to manage API using policies. A policy can be applied to an API to manage its behavior without any code changes. These are applied at the gateway level.
There are various policies provided by MuleSoft, such as
Cross-Origin Resource Sharing (CORS)
OAuth0 Authentication Policy
Client ID Enforcement.
And many other policies are supported by MuleSoft. Visit MuleSoft docs to see the actual list of policies supported by flex gateway.
Steps to use Flex Gateway
In this blog post, I'm going to demonstrate using a Linux box I have. I have a simple User Management API developed in Python (Fast API). API allows an Admin user to manage users, profiles and permissions. For this blog post, I choose the following policies, such as Logging Policy and Rate Limiting with SLA policy.
Prerequisites:
The following prerequisites are needed,
Anypoint Platform access. To try it, you can create a 30-day trial at this page
API you have developed in another language other than Mule
Linux Server
Install Flex Gateway
In Runtime Manager, click on Flex Gateways in the side menu.
From there, click on Add Gateway button.
Select the Linux option and follow the steps mentioned there to install the Flex gateway in a Linux box.
Use the below command to install flex-gateway to the Linux server
curl -XGET https://flex-packages.anypoint.mulesoft.com/ubuntu/pubkey.gpg | sudo apt-key add -
echo "deb https://flex-packages.anypoint.mulesoft.com/ubuntu $(lsb_release -cs) main" \
  | sudo tee /etc/apt/sources.list.d/mulesoft.list
sudo apt update
sudo apt install -y flex-gateway
- Use the below command to start the flex gateway
sudo systemctl start flex-gateway
- Once it's installed, execute the below command to start the flex gateway, register it in Runtime Manager
sudo flexctl register <GatewayName> \
  --token=a8c34b42-a6be-4c82-92be-db7496983289 \
  --organization=0de7096a-6bf0-422c-a567-7450c69c0405 \
  --connected=true \
  --output-directory=/usr/local/share/mulesoft/flex-gateway/conf.d
- You can also check the related services using the below command
sudo systemctl list-units flex-gateway*
API Manager Configuration
Once your application is deployed to your server, we need the implementation URL for the application
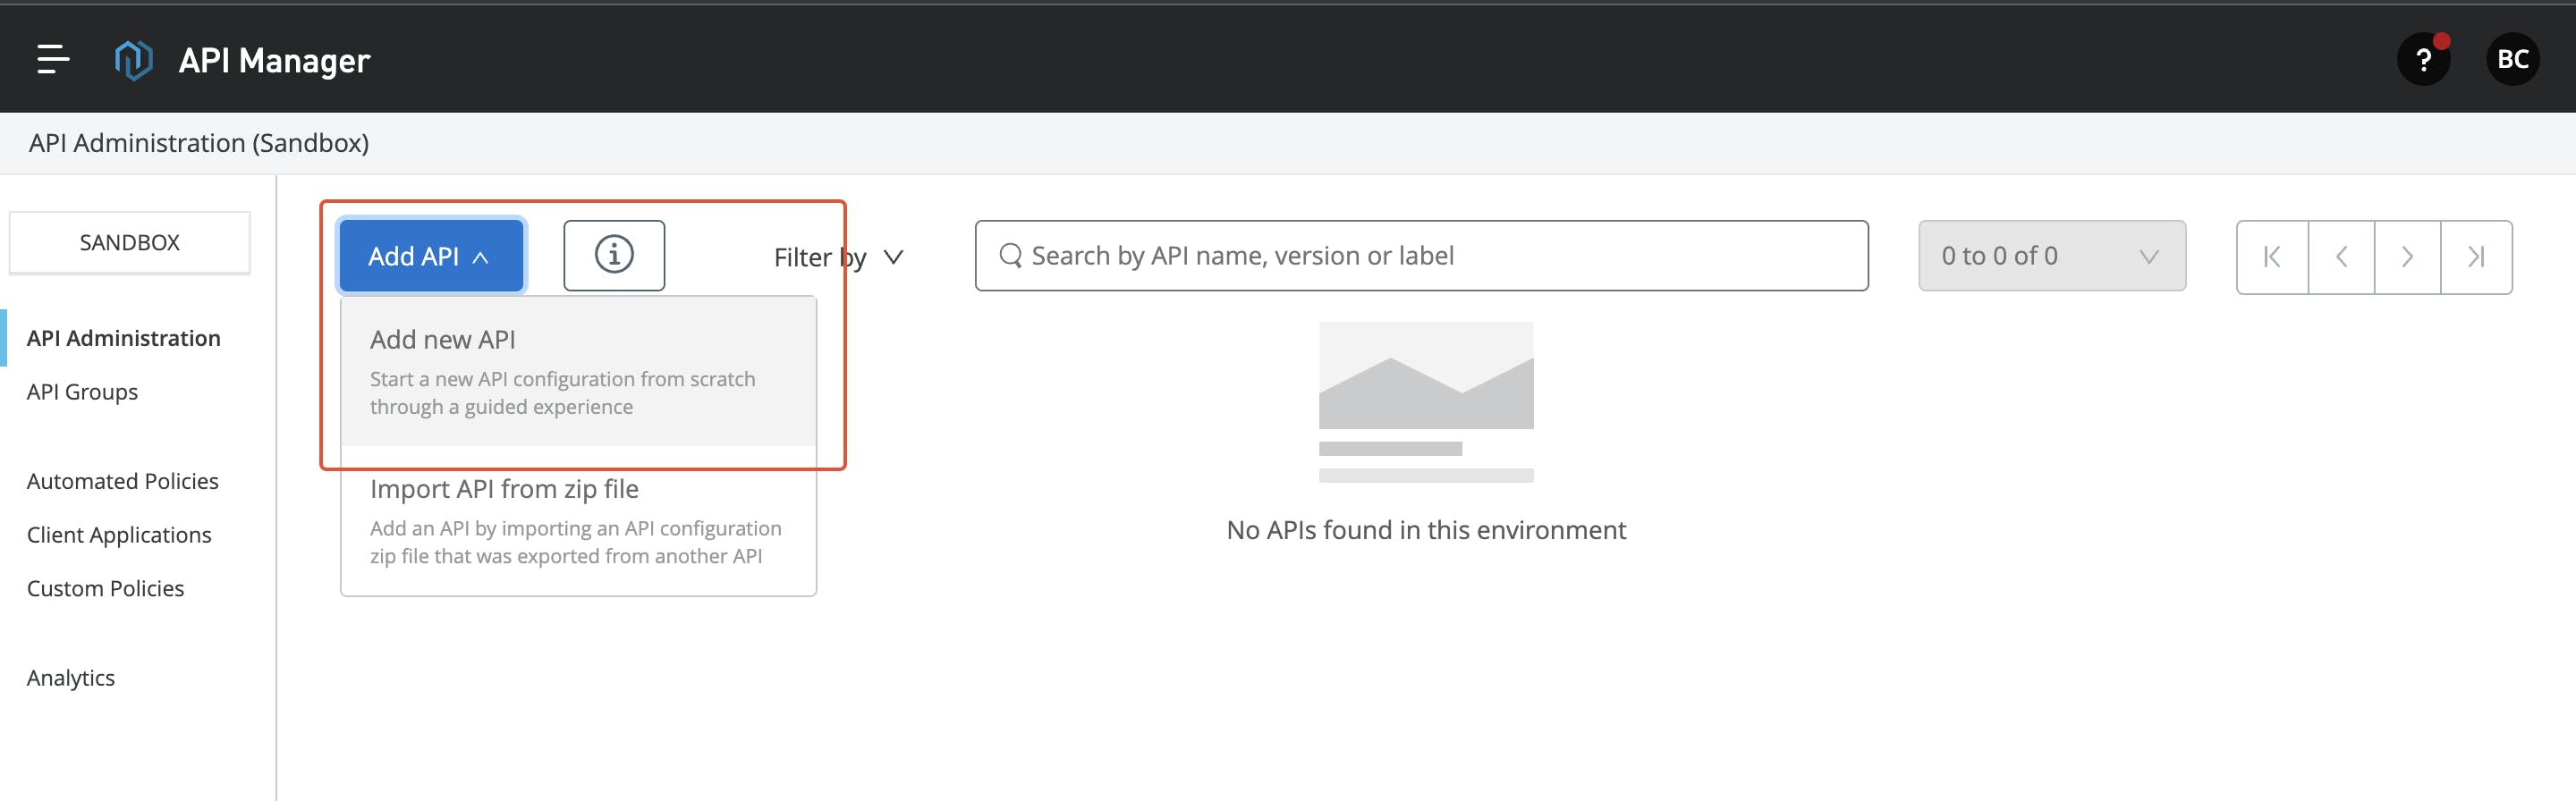
Go to API Manager, and click on Add API button at the top of the page. Click on Add New API.
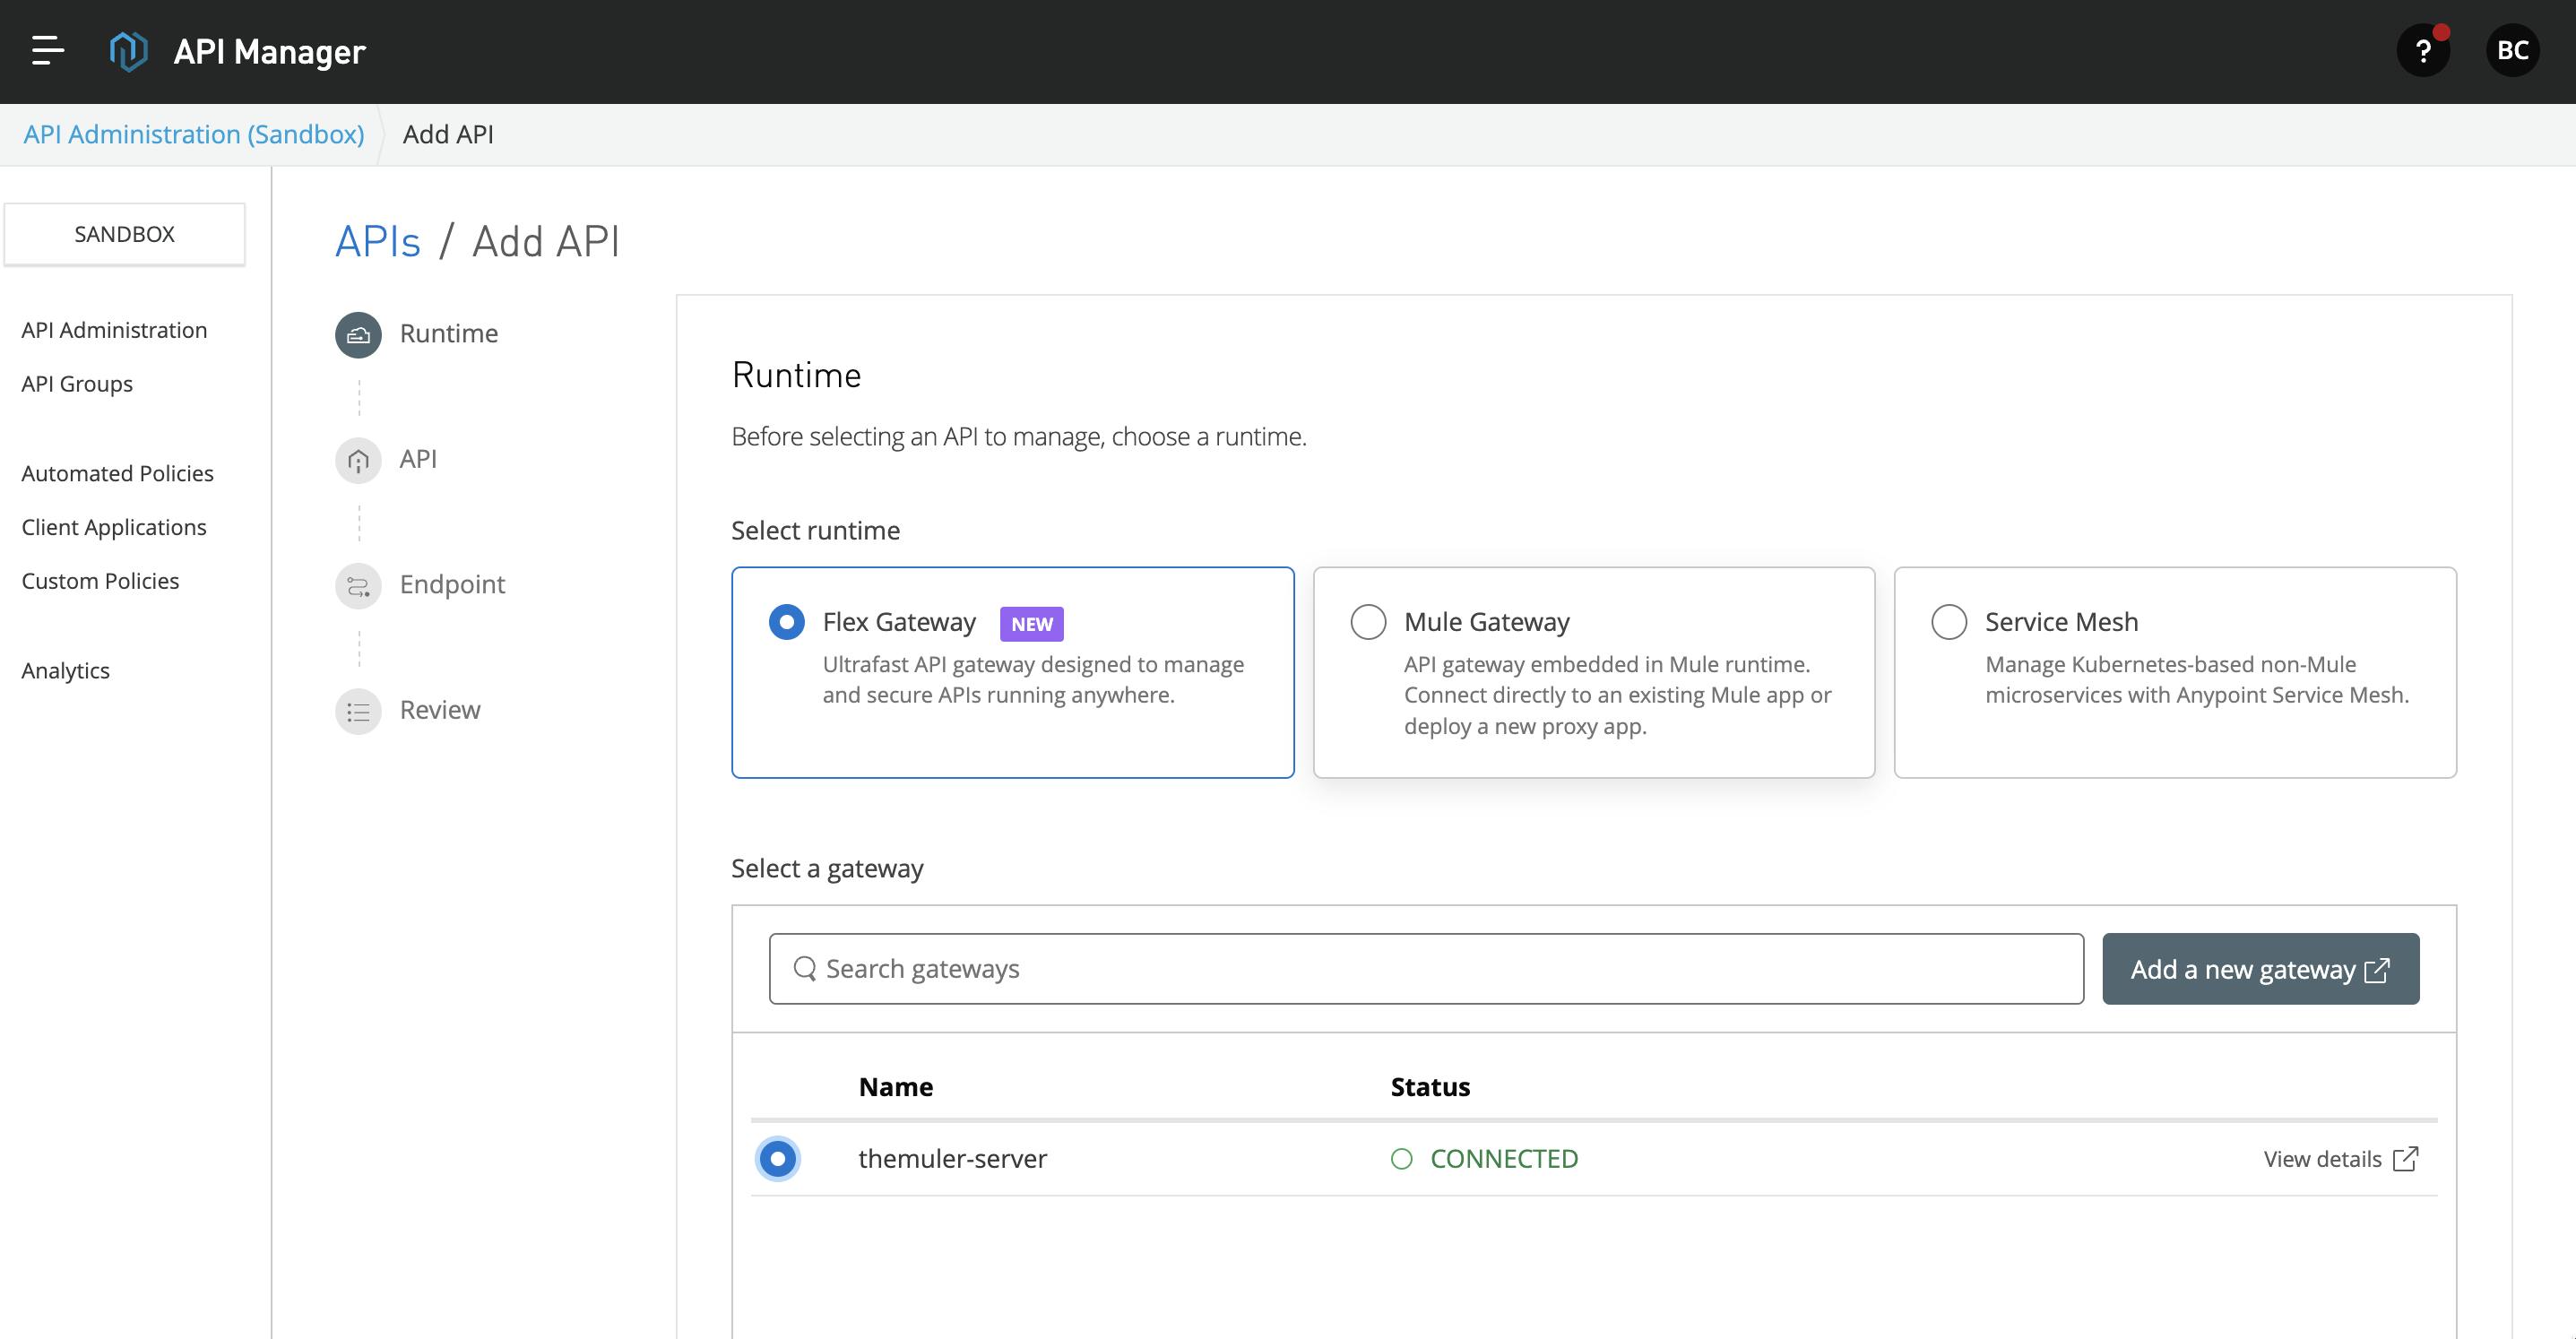
- In the Add API page, select the Flex gateway and select the gateway you have added above. Click Next to continue.
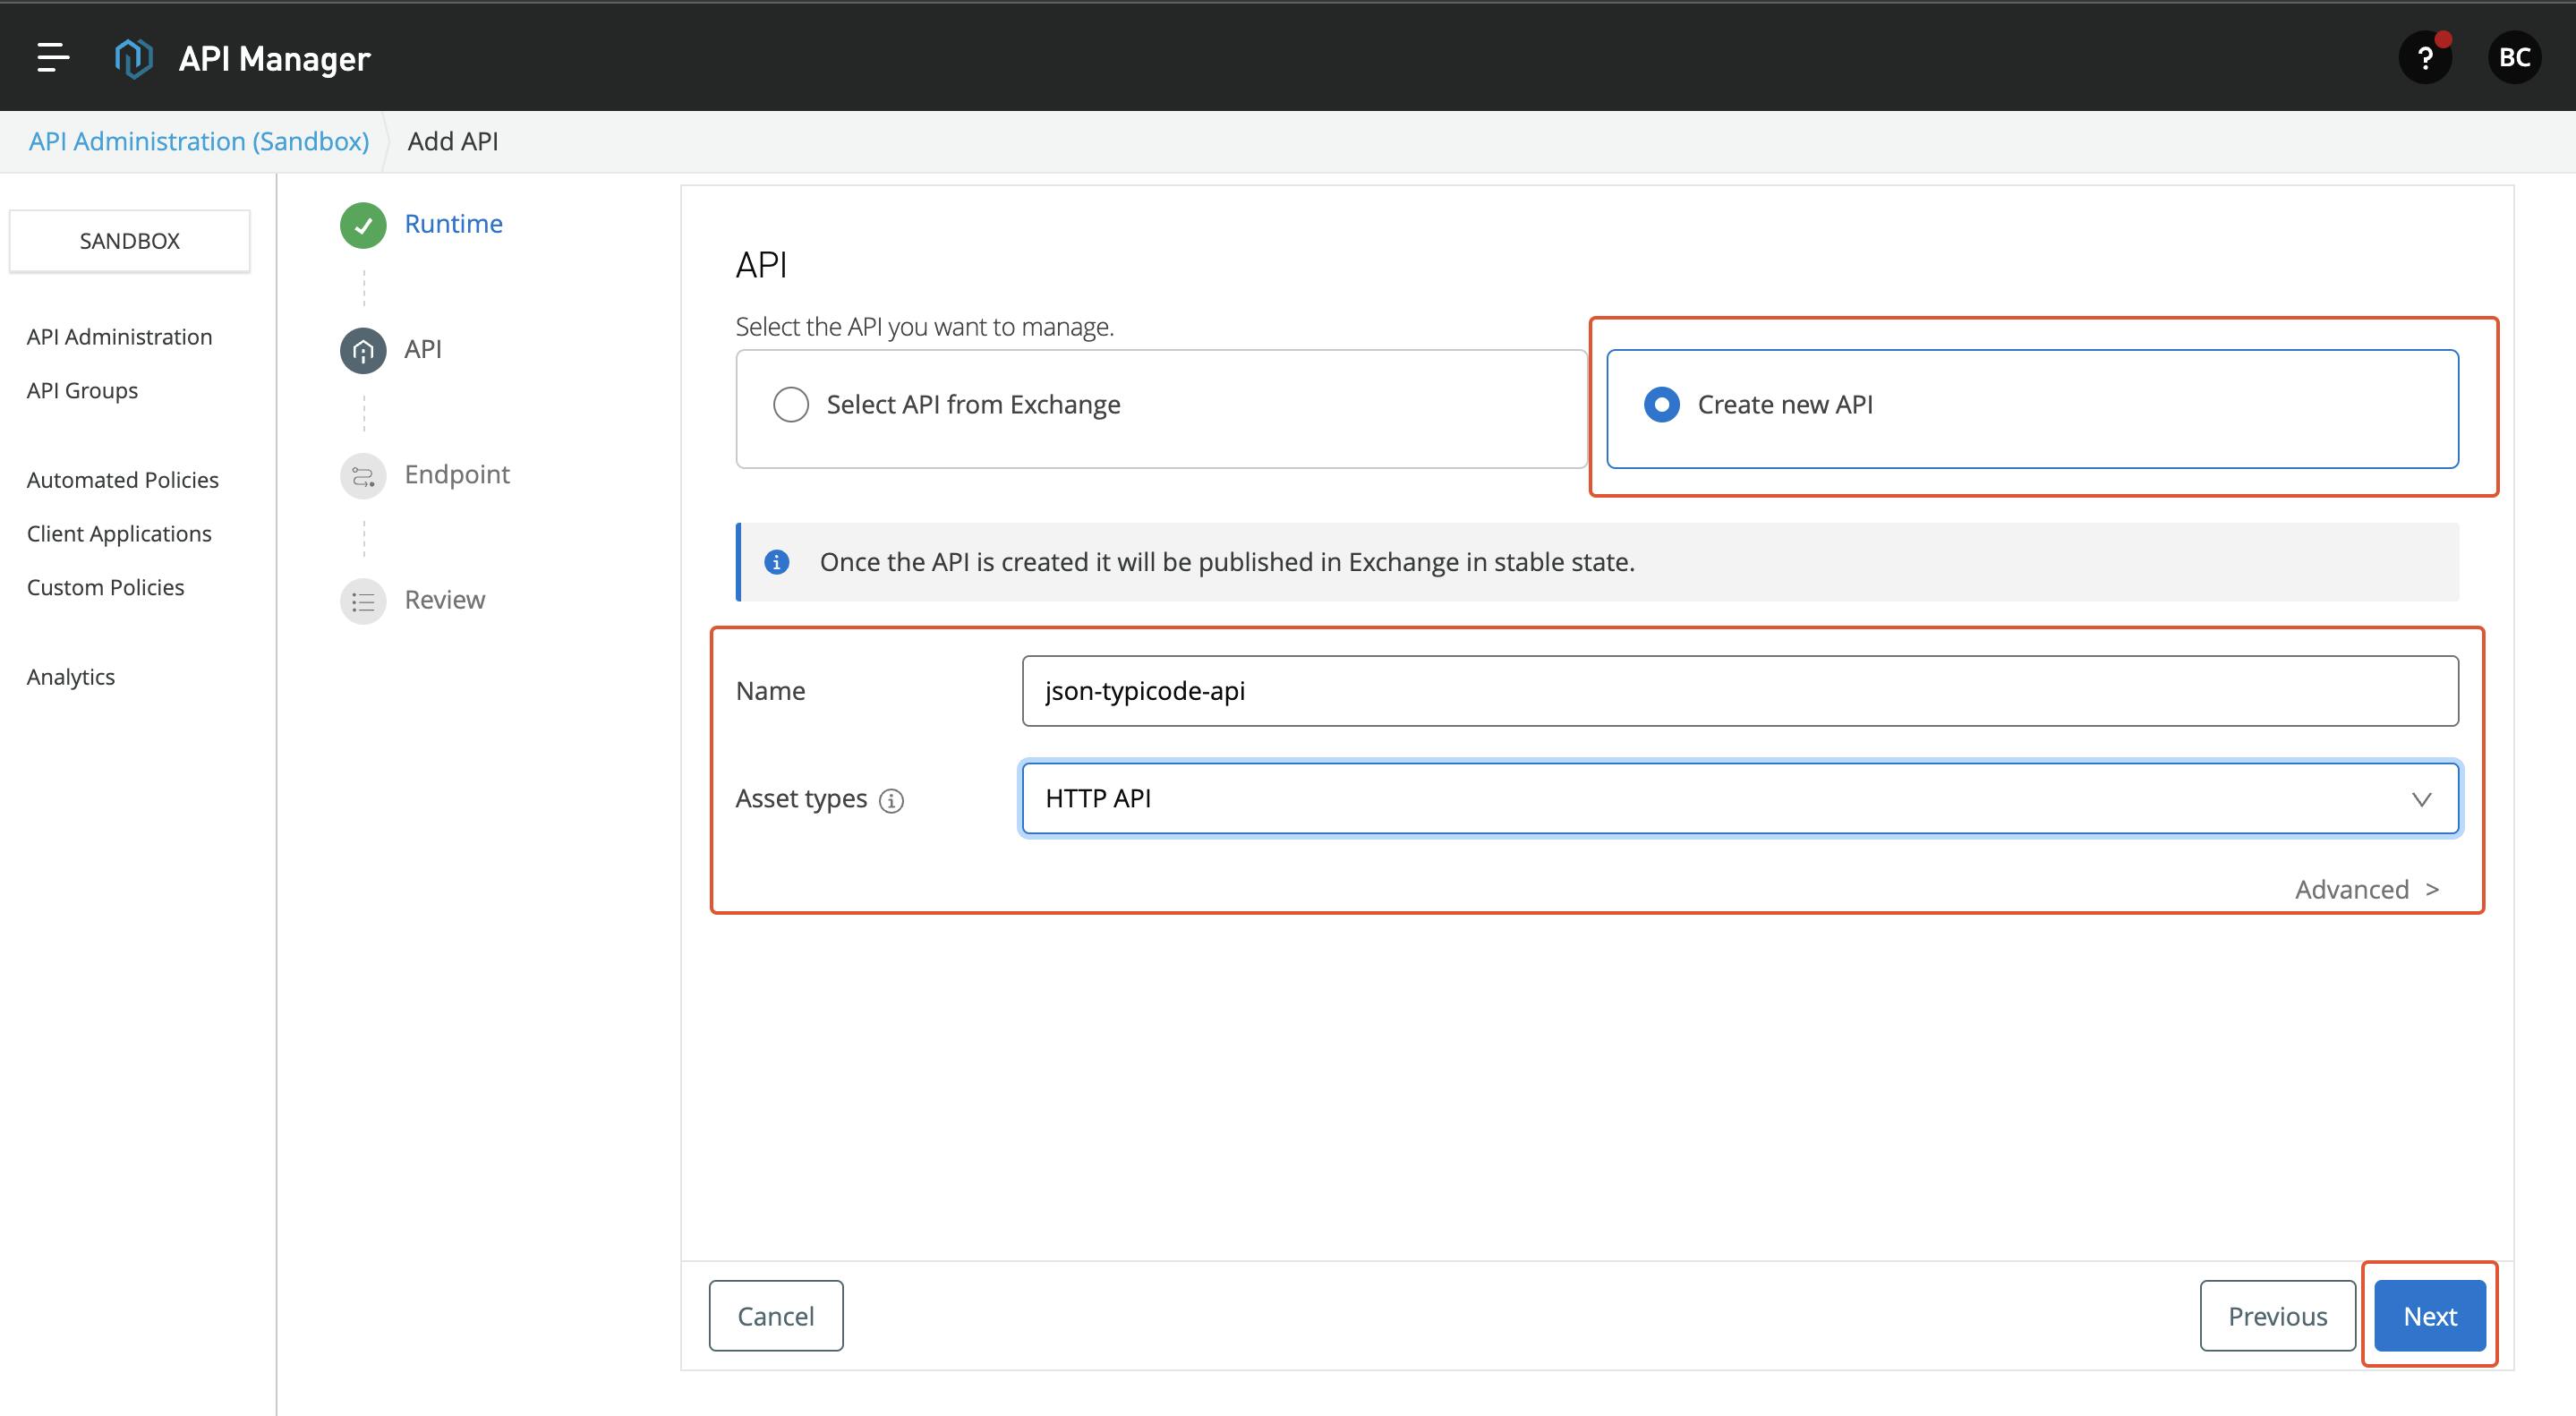
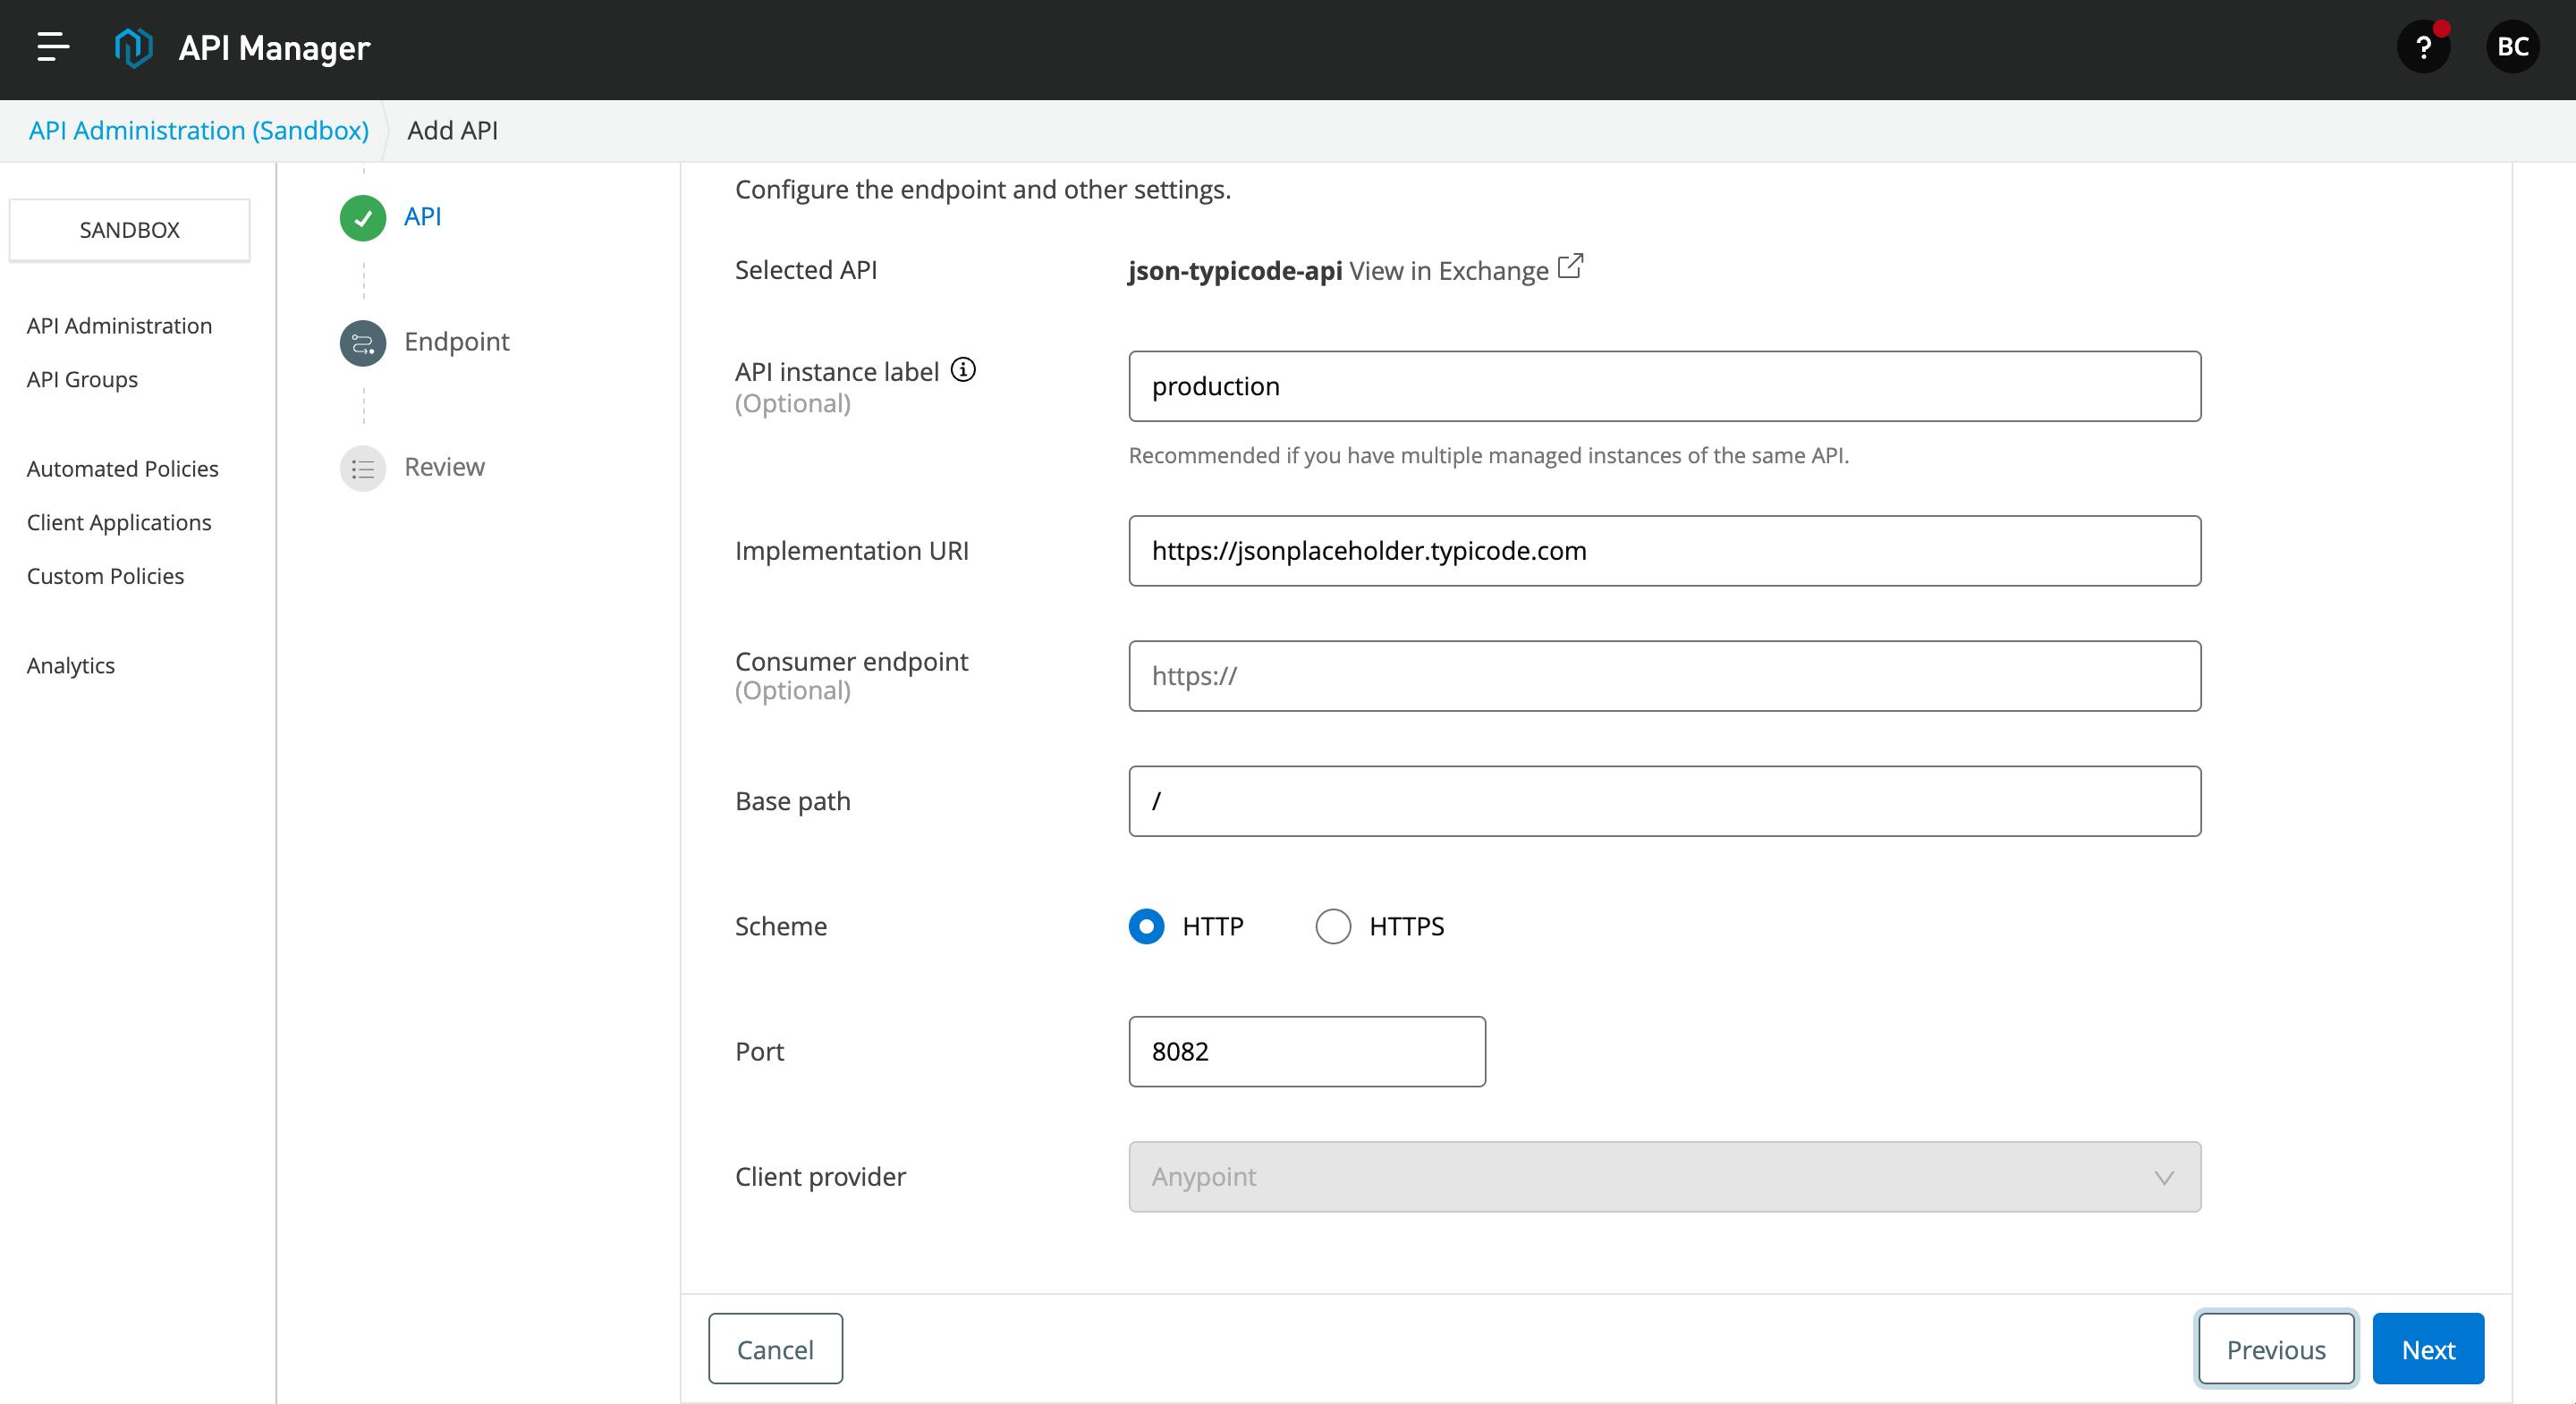
- In the next page, you can either select API from the exchange or create a new API. Give the appropriate name and asset type based on your API. For this blog, I selected HTTP API. I'm going to interface JSON Typicode API and manage it. Click Next to continue.
- In the next page, you can add the endpoint details, base path and port. Click on Next to continue.
- Here, you can see the full summary of the flex gateway API configuration. After this, click on the Save and Deploy API button below.
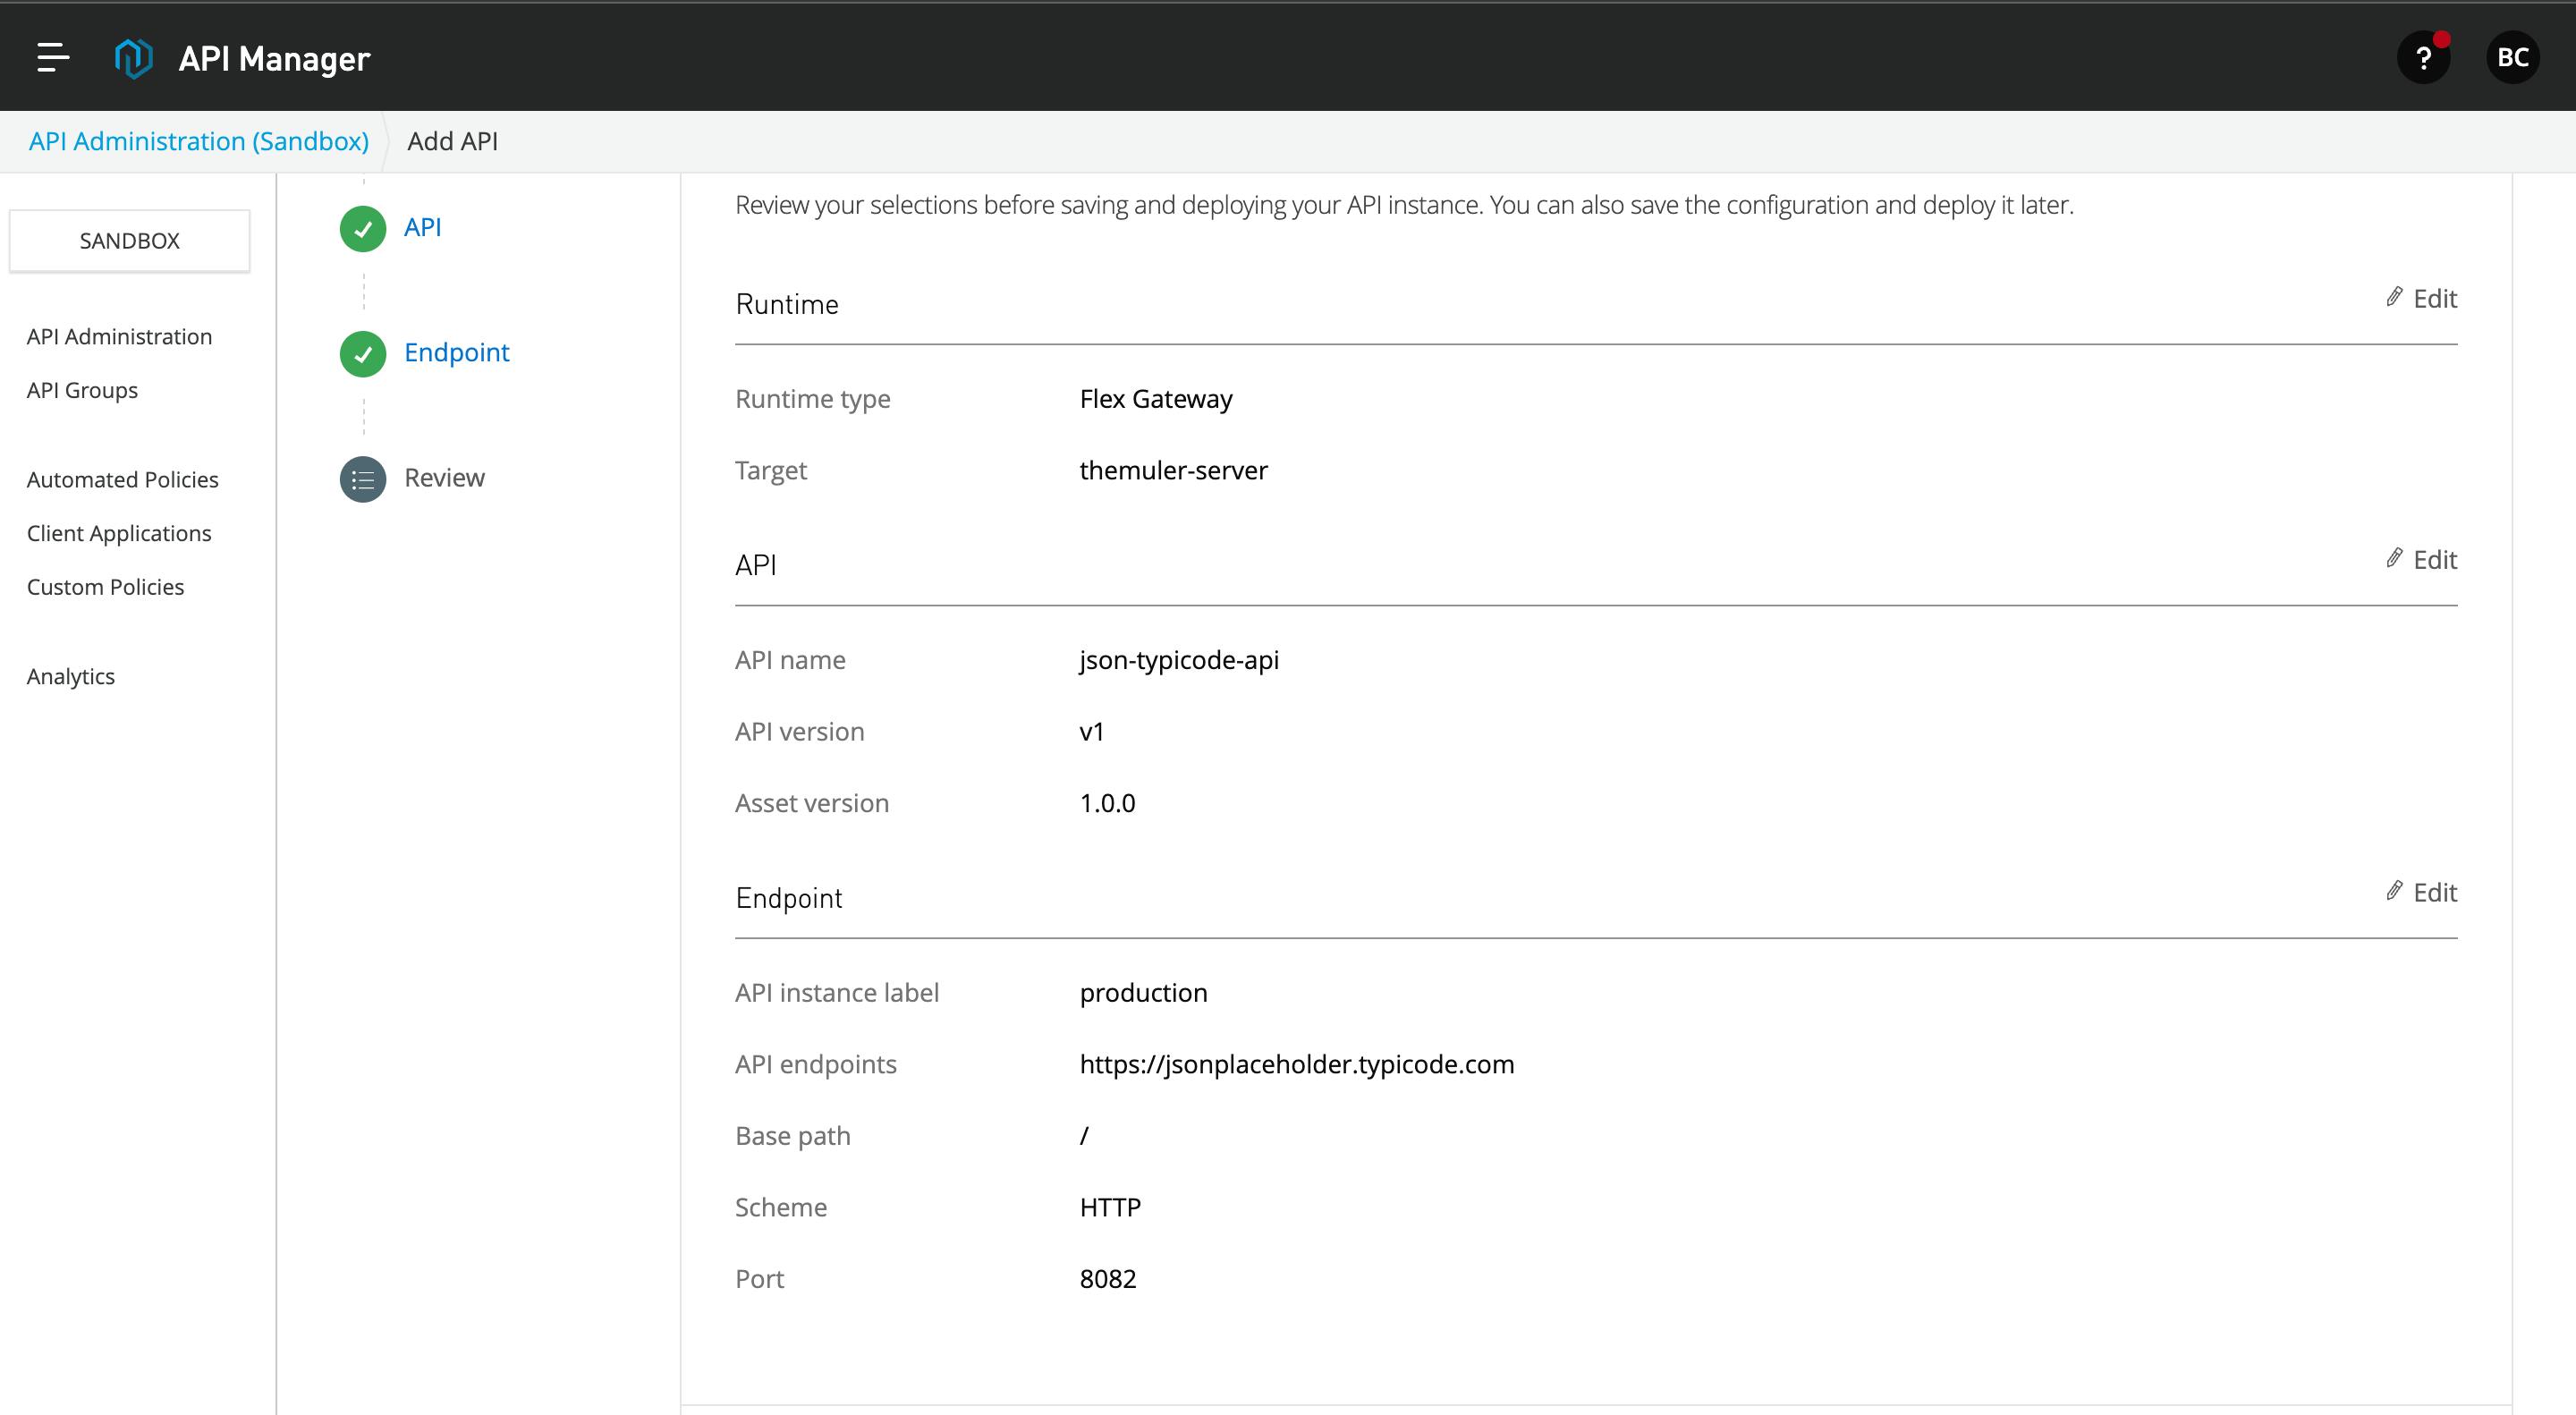
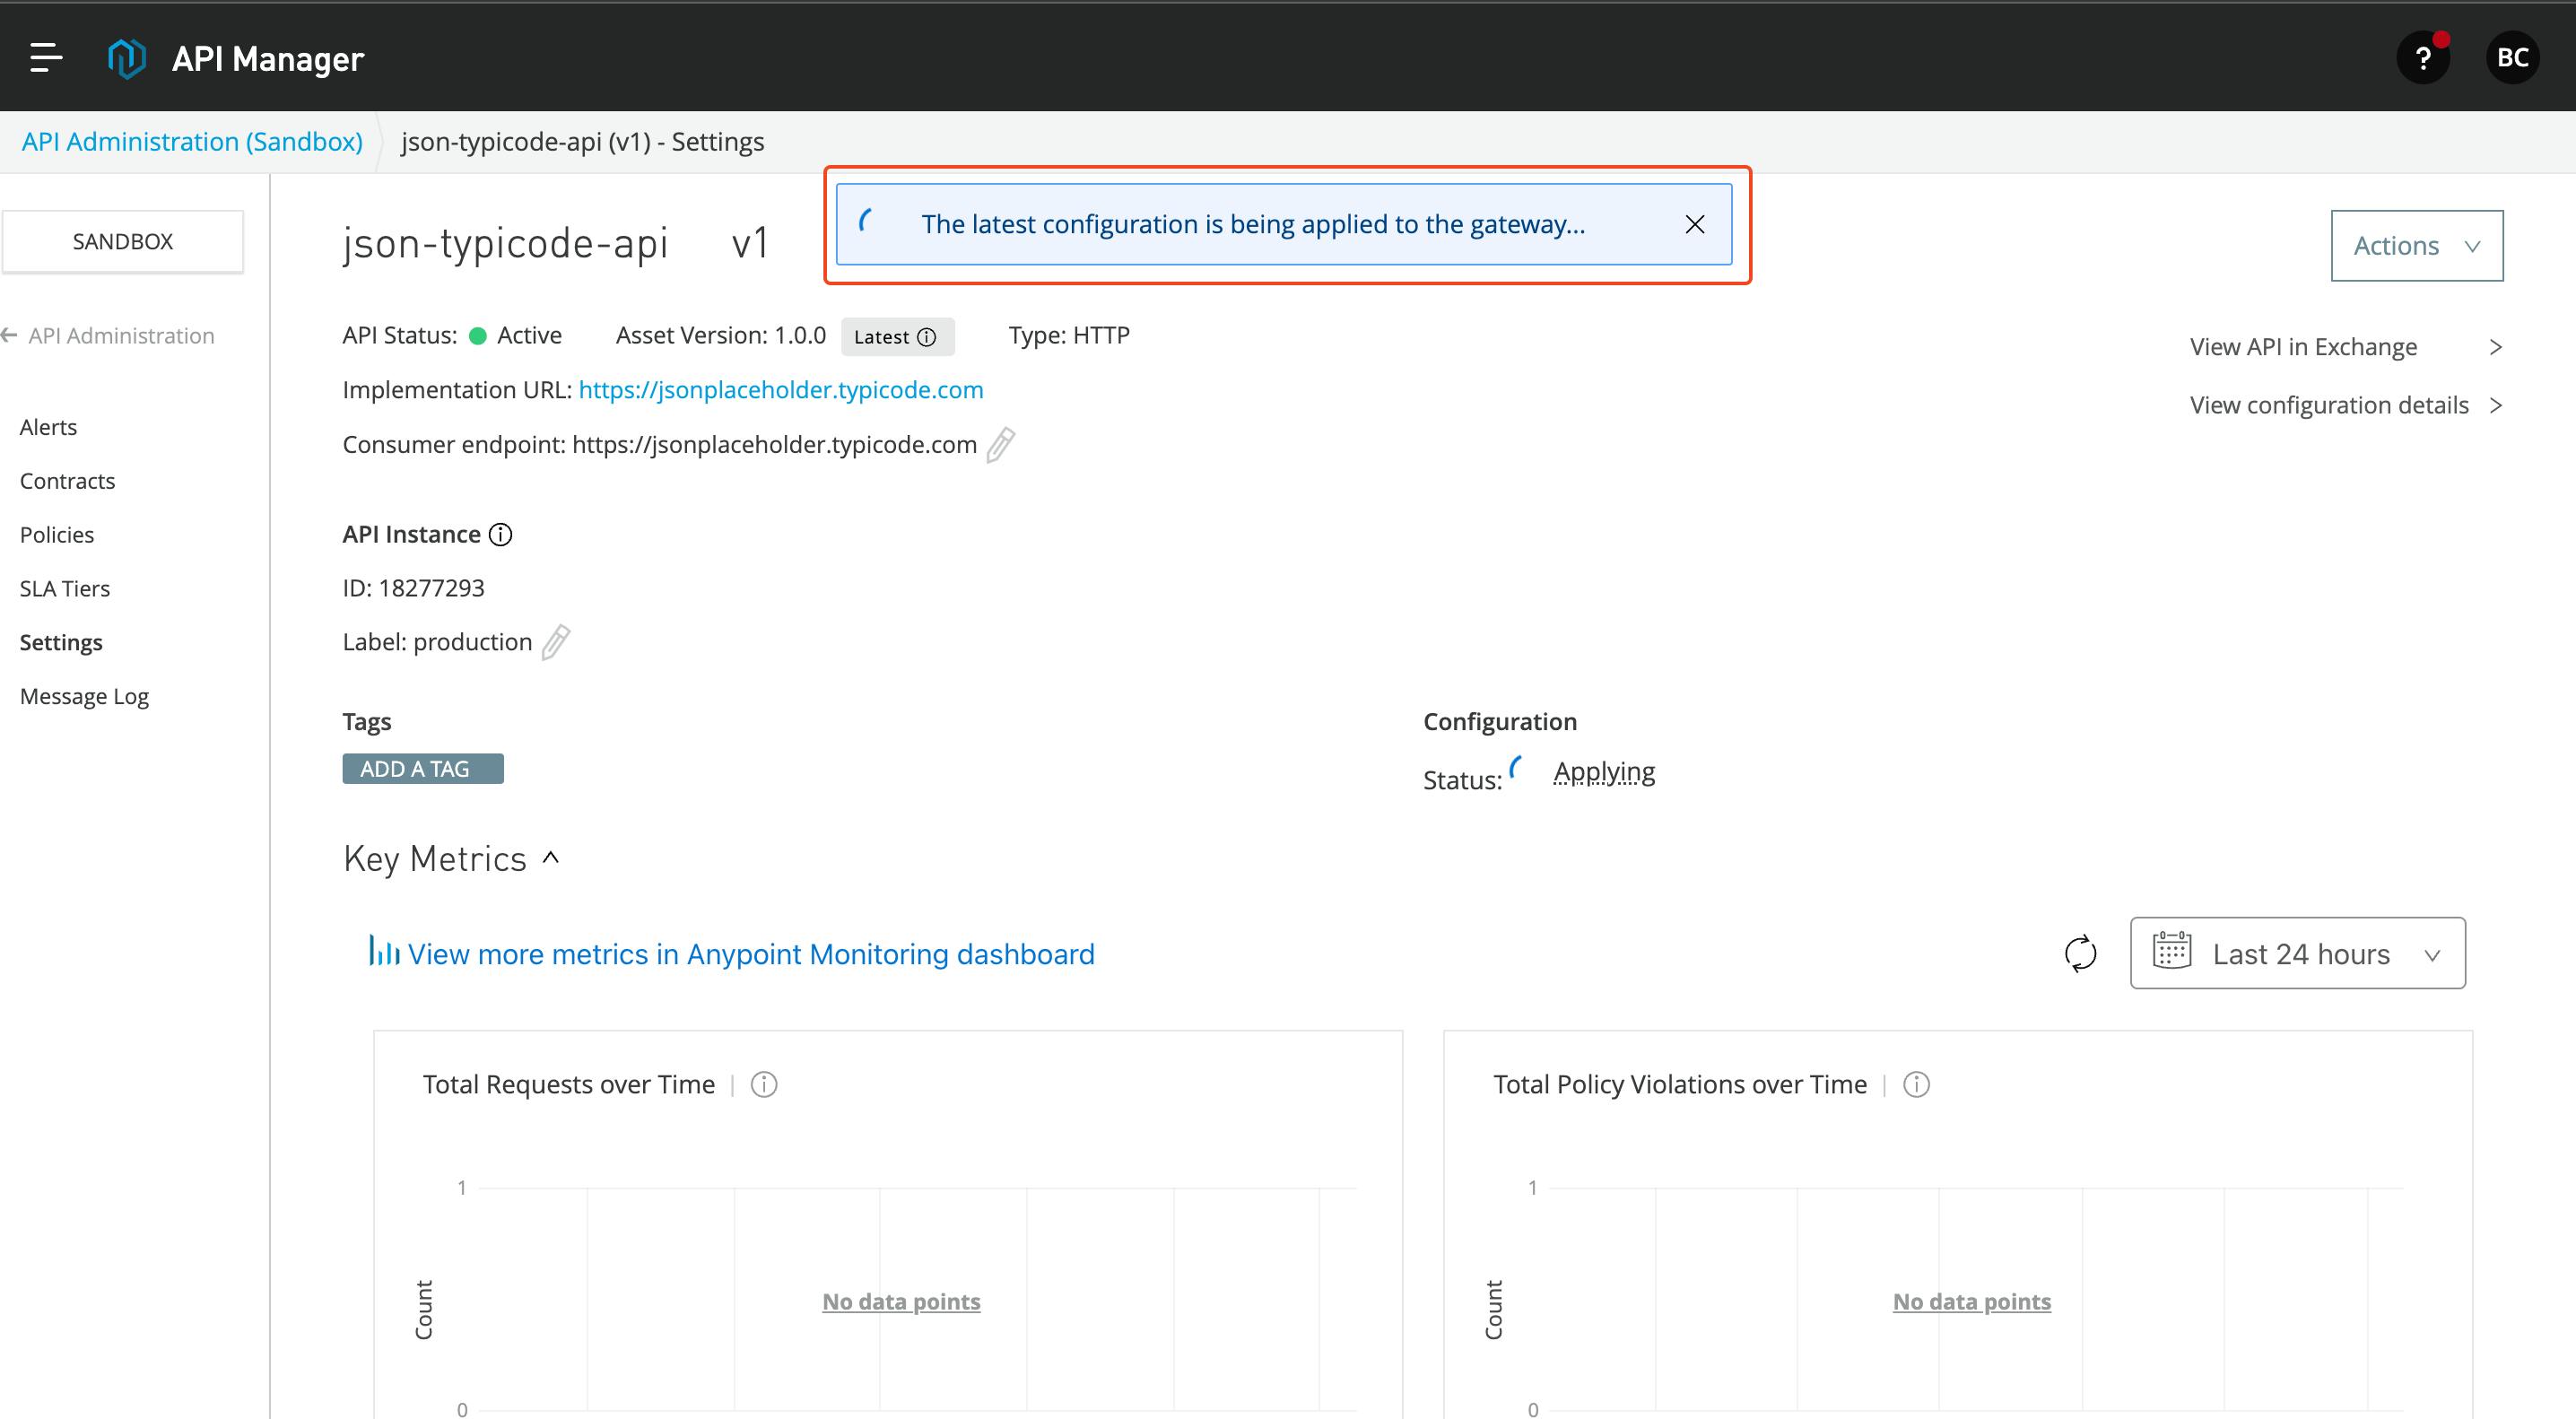
- API manager deploys the API to the flex gateway, and it will apply the API configuration to the flex gateway.
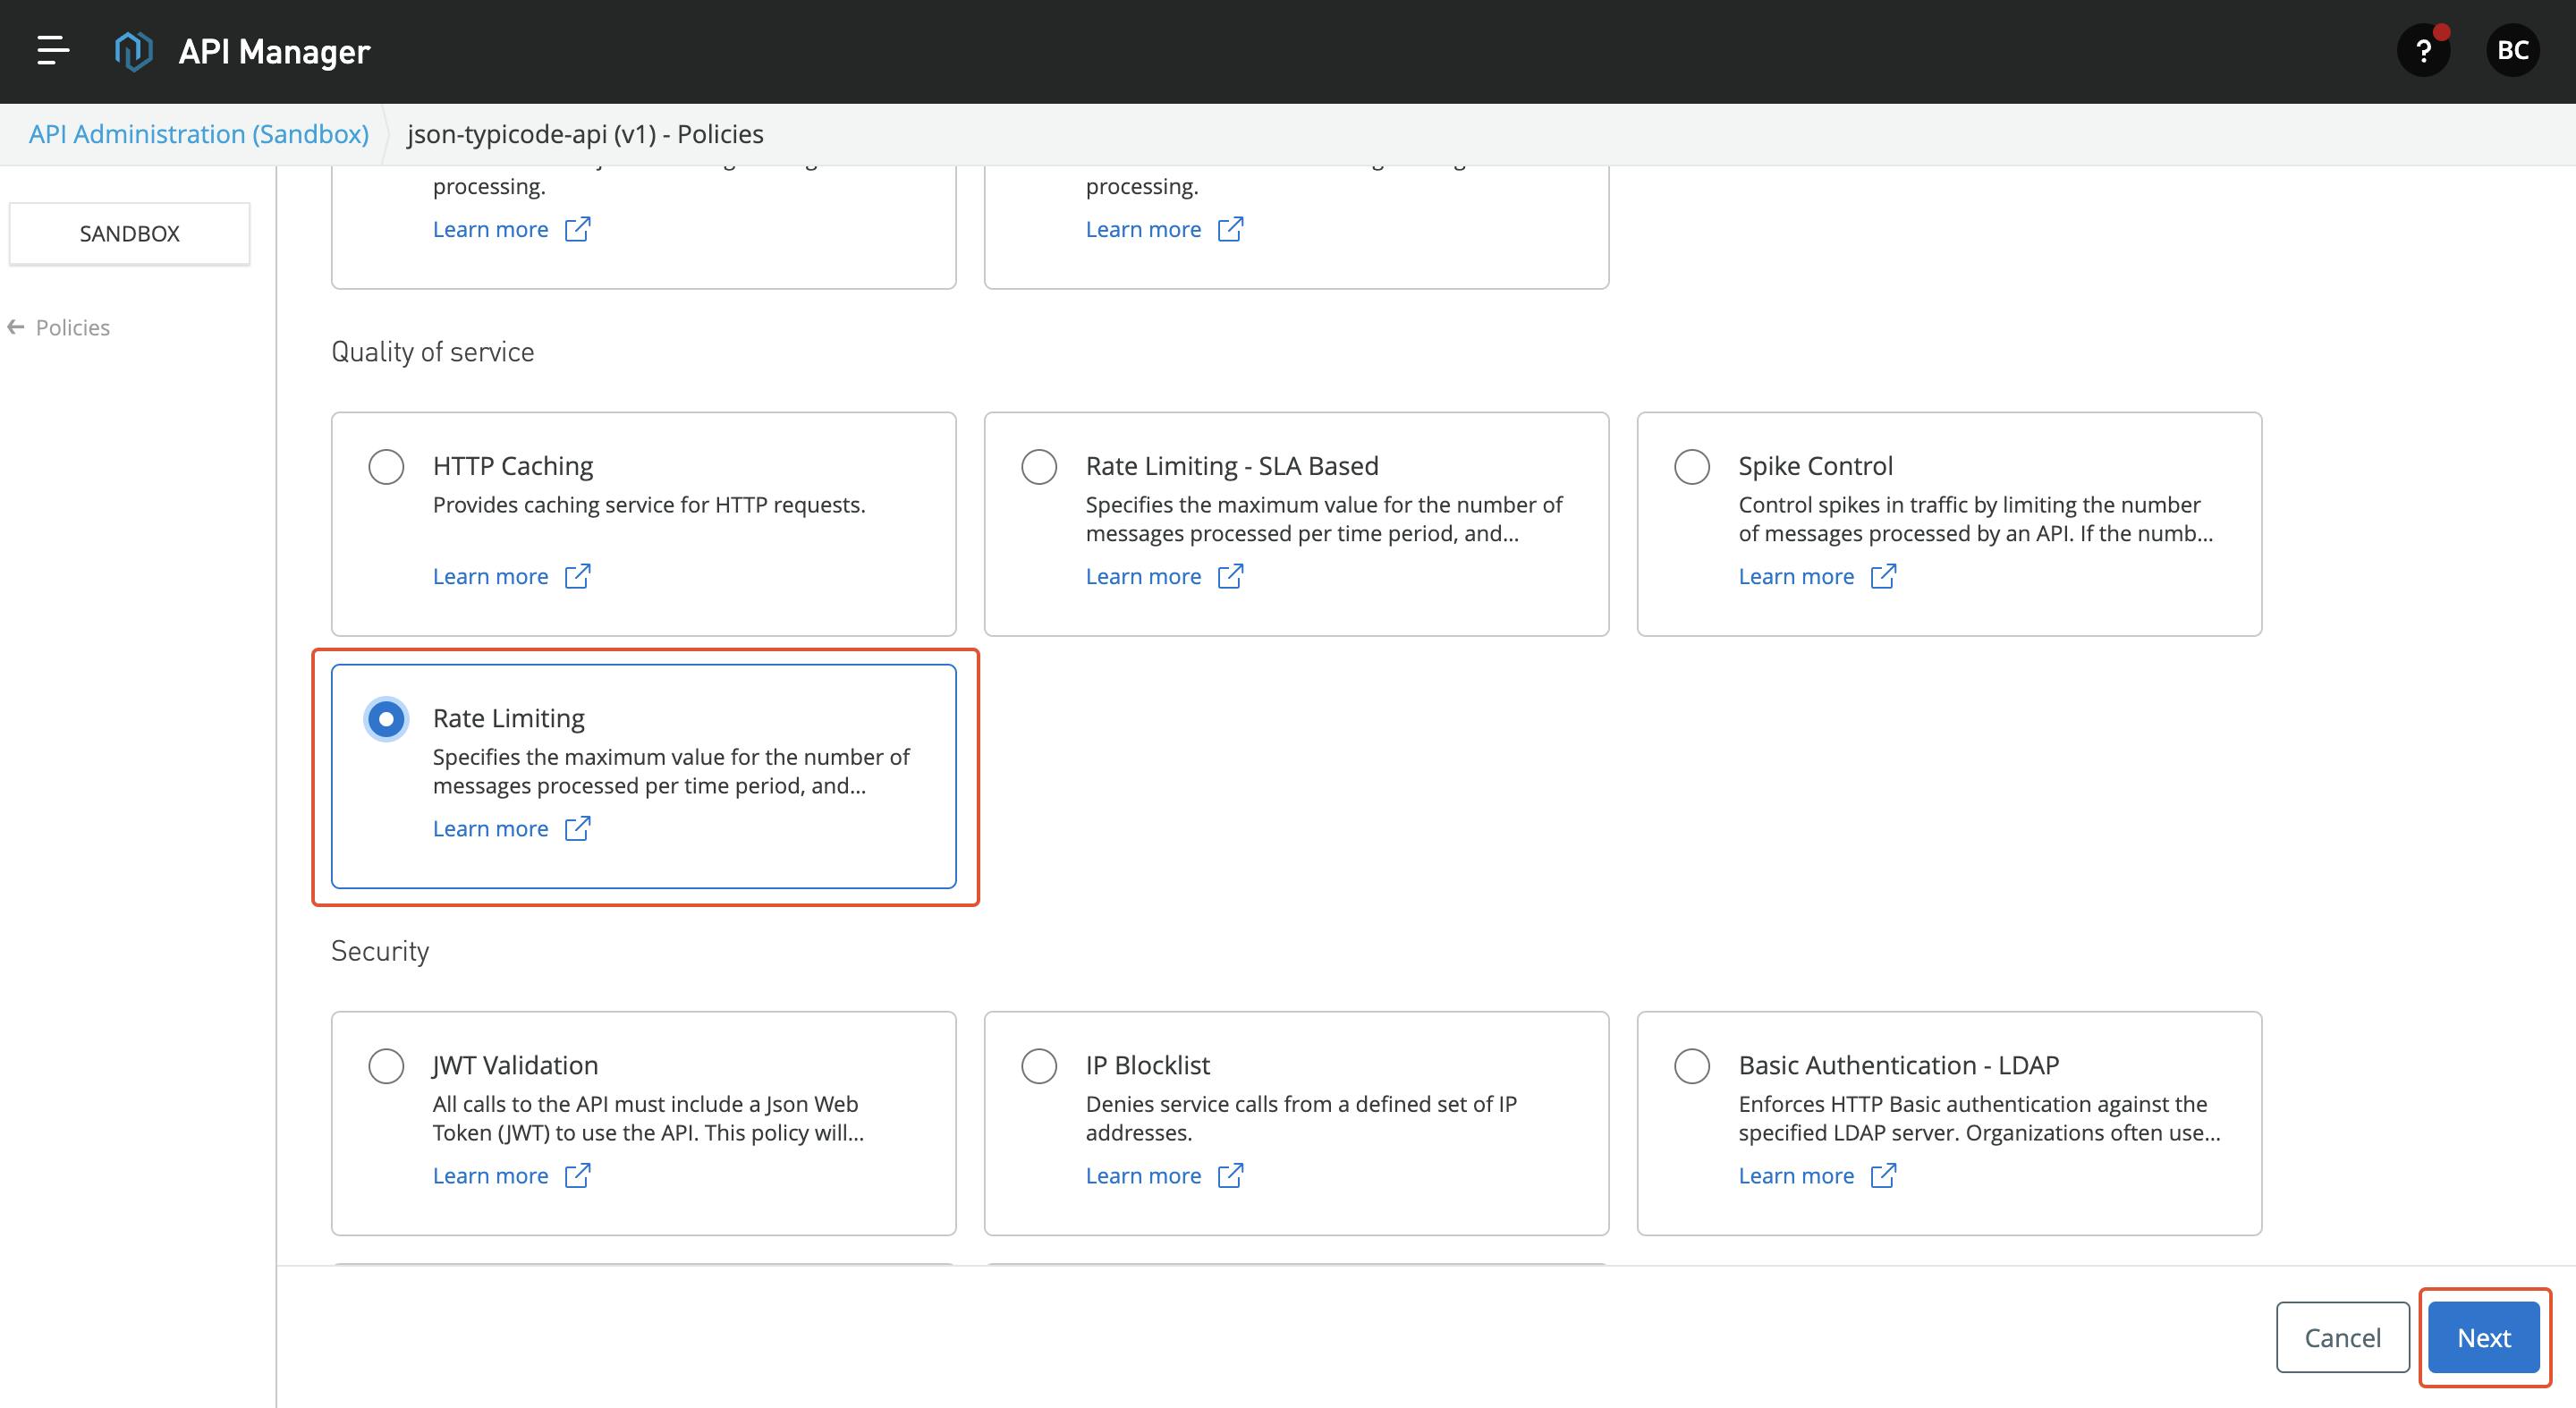
In this article, I am going to apply two policies: Go to the policies page and select Rate-Limiting Policy.
Rate-Limiting Policy: This policy is used to set a compliant limit on the API. Restrict unnecessary calls to API.
Add the necessary configuration to enable the policy
Next Select, Client ID Enforcement and select Basic Authentication as the credential origin.
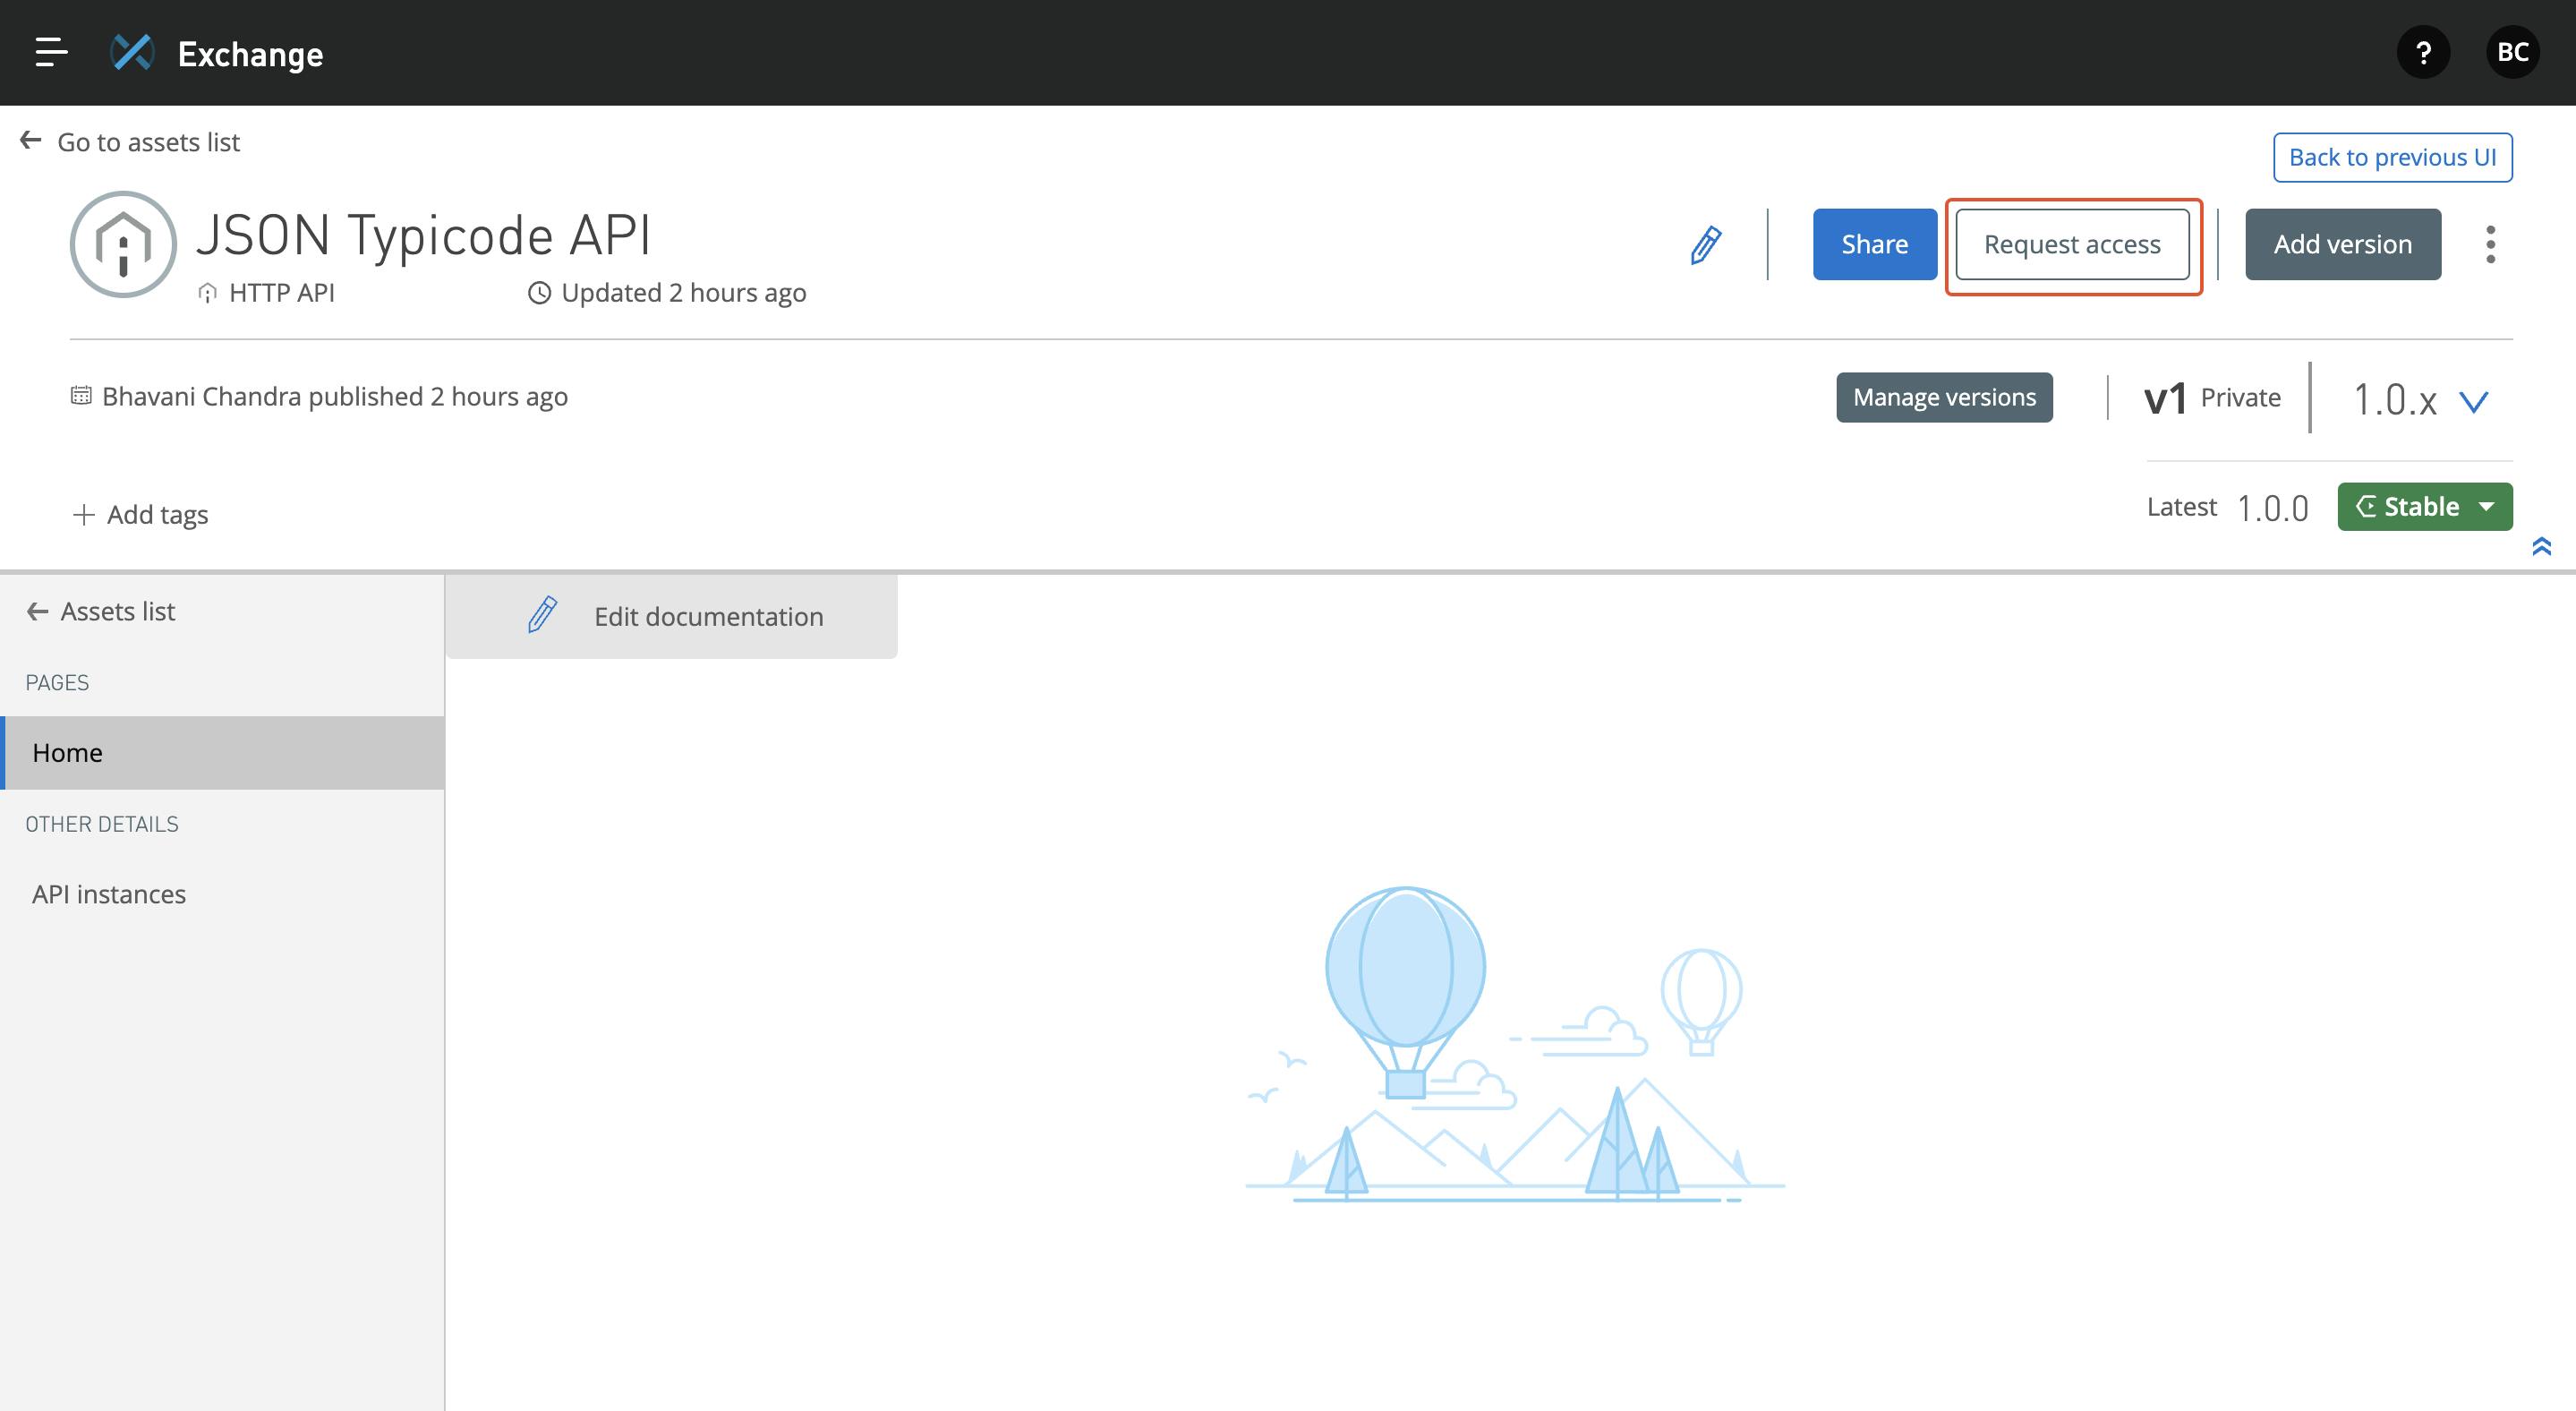
Now, to access the API, we need the client ID and client secret. Go to the Exchange and click on the Request Access button. Follow through the creation process and get the tokens.
- Once you got the access, you can go to the server where flex gateway is created and use localhost to make API calls as shown below
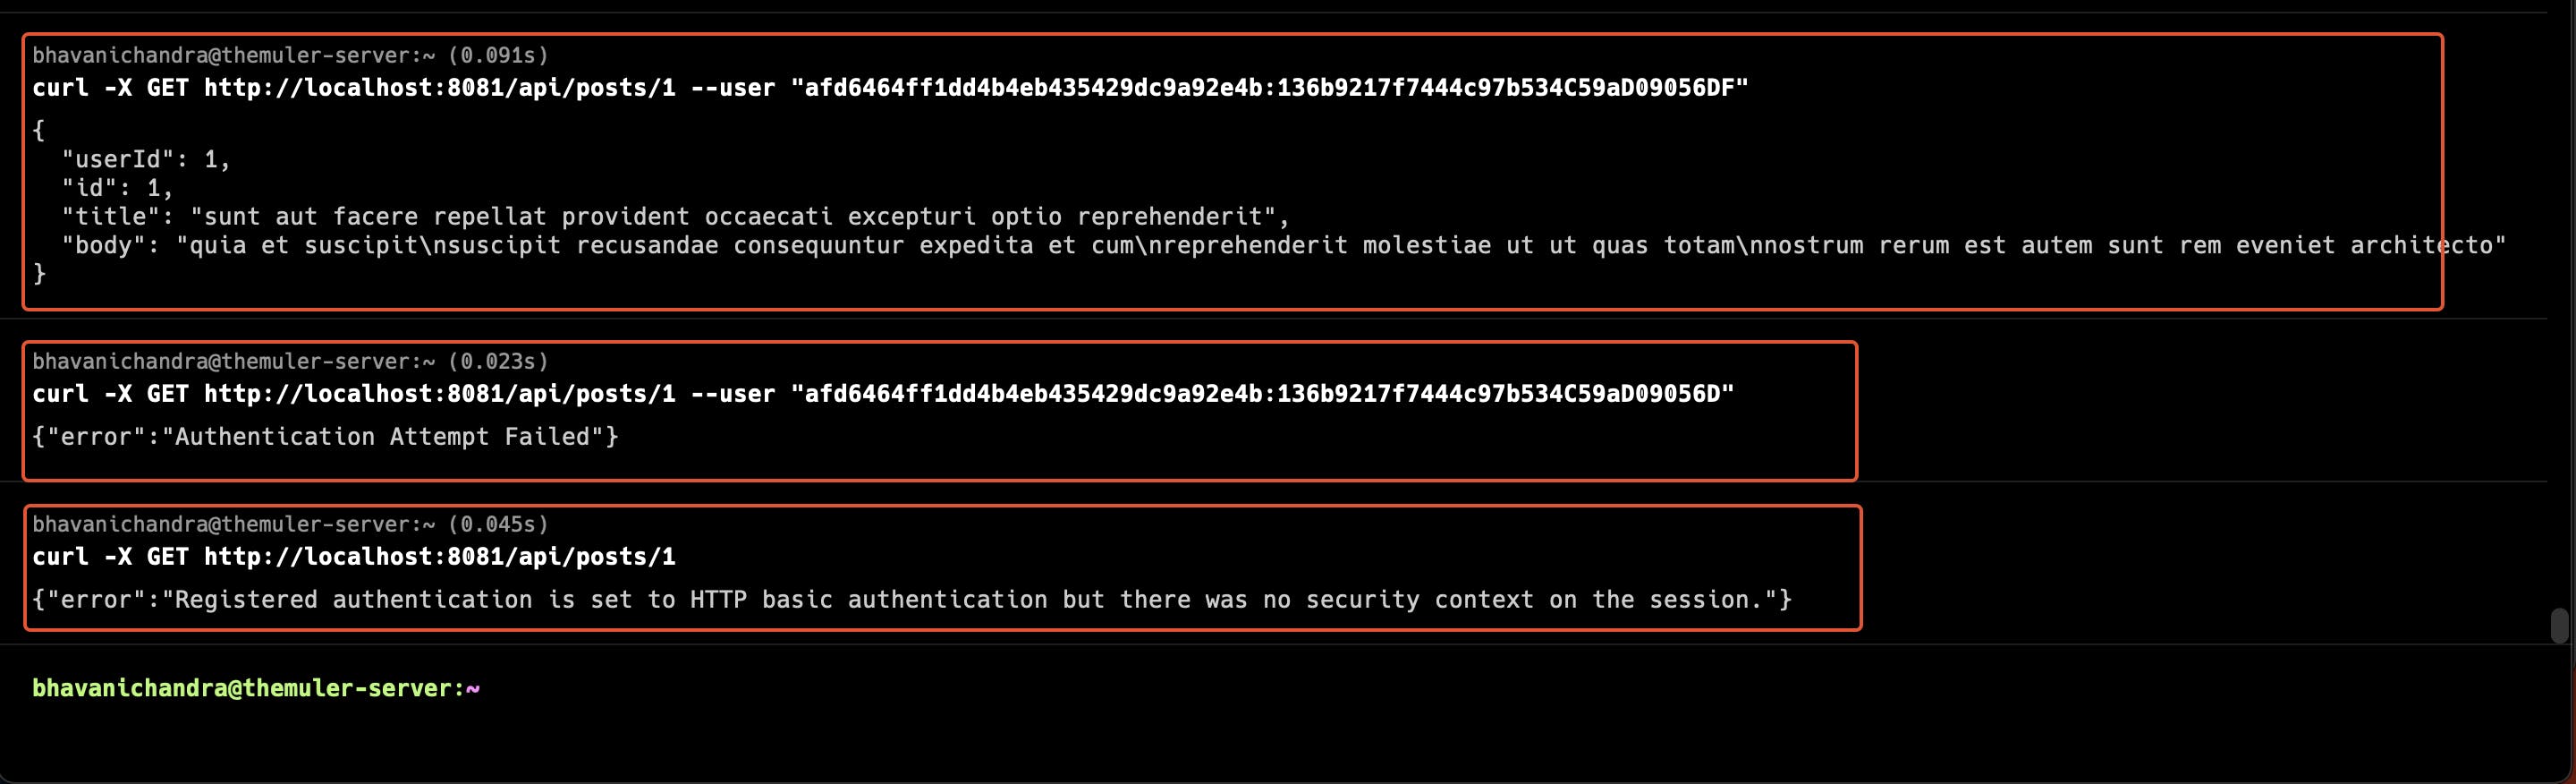
In the above screenshot,
The first call is made to users/1 endpoint with a client ID and Client Secret with Basic Authentication
The next Call is made with an invalid Client Secret, which throws an error out, as the client secret is wrong
The Last call in this image shows that a call is made without a basic authentication header.
From these above calls, we can be sure that Client ID Enforcement is applied to the API.
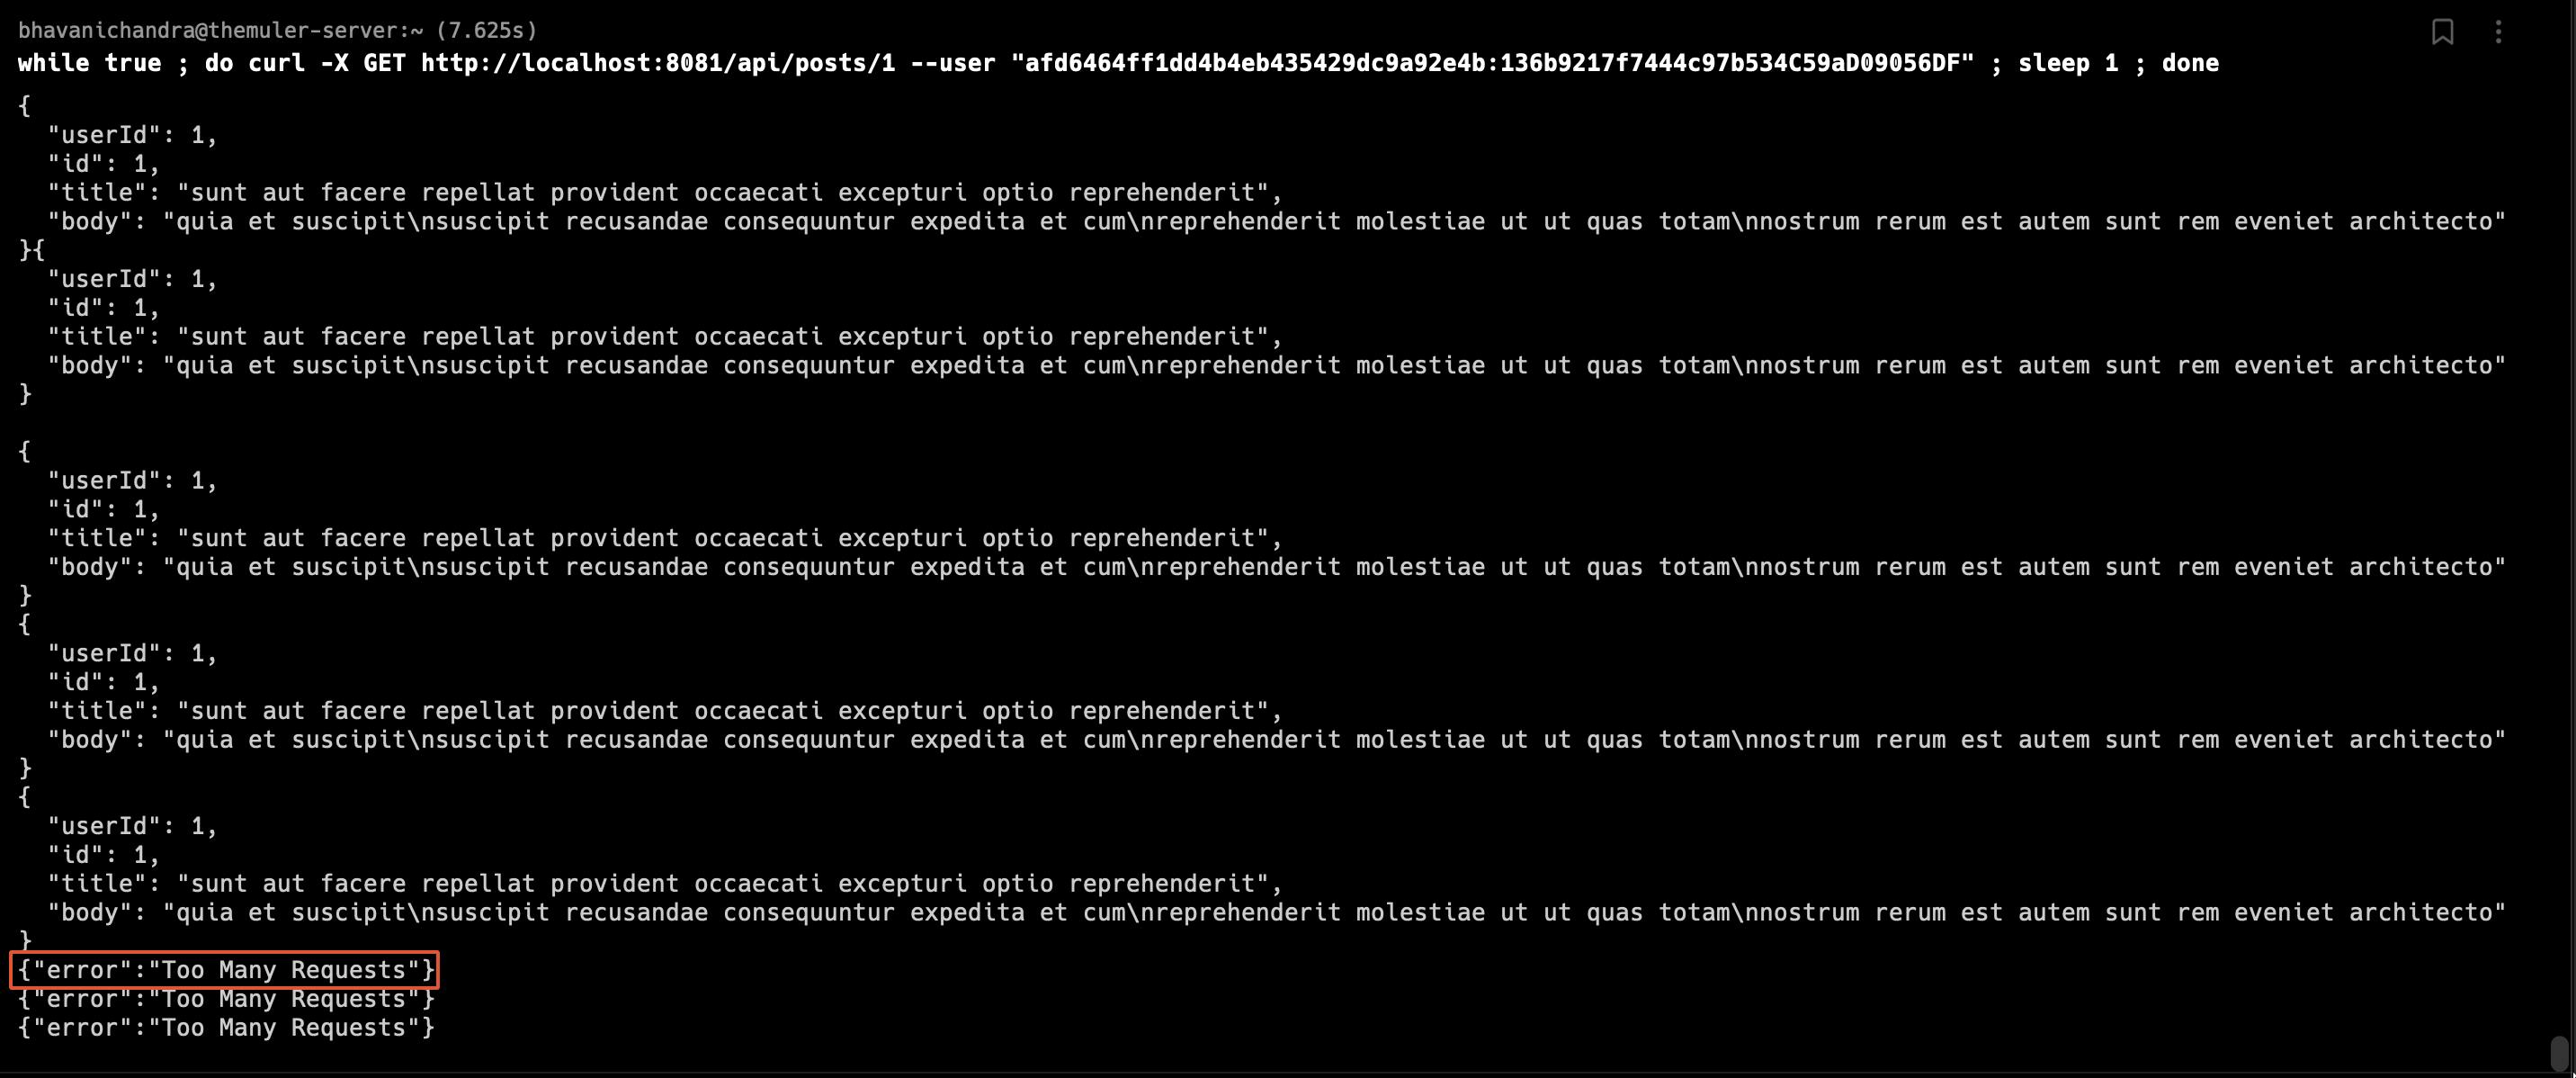
In the next HTTP call, I called the API every second to trigger the Rate-Limiting policy. You can see Too Many Requests' response, which indicates the policy worked.
Sources:
MuleSoft Documentation - docs.mulesoft.com
MuleSoft Blog Posts
Thank You
Feel free to comment, or reach out. Thanks for your time.